Good Morning to my single follower 🙂 Thanks! I hope this number grows, this is pretty fun.
Today I’d like to show how I did my backsplash in my kitchen. I’ve said it before, and I’ll say it again: I’m cheap. My husband– well, he makes me look like a big spender, but hey, that’s another story. So when I started trying to find some cheap ways to put in a backsplash, I looked at tile clearance sites, pinned a bunch of ideas, and yet everything would have cost me hundredS of dollars. Not cool.
One of the things I really liked was the idea of a pressed tin/metal backsplash. I super-love those old tin ceilings, and thought it would be a unique, creative backsplash (you’ll see as I post more and more, I’m not a fan of “everyone else’s” stuff).
Fast-forward to a day I was in Menard’s (it’s like Lowe’s or Home Depot, I think they’re mostly in the midwest) and I walk past an end cap with clearance stuff, and a roll of embossed wallpaper catches my eye:
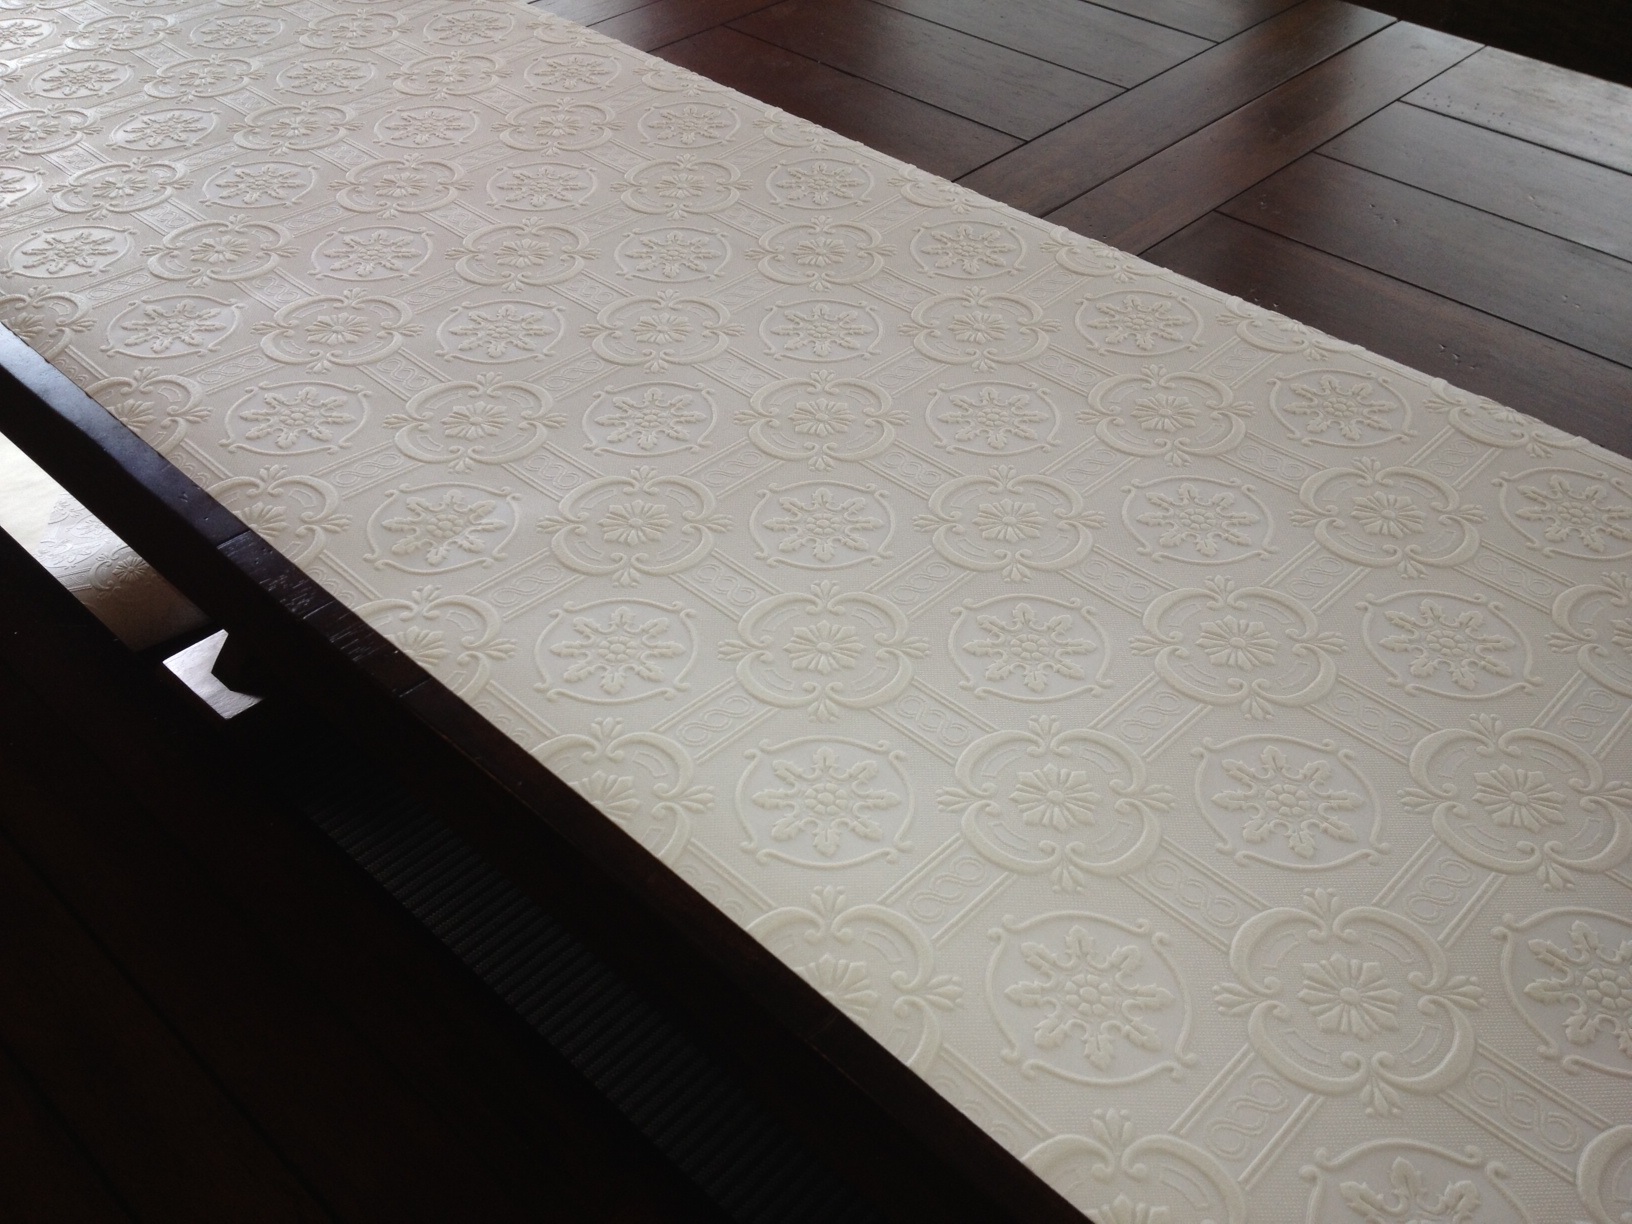
It was only $8. AND it looked like old tin ceiling! So I scooped that puppy up! I’m not one to back down from a challenge, and I knew I could find some metallic paint to make this pretty much any color I wanted. I had recently repainted my kitchen, and knew I wanted a copper-colored backsplash. Here’s the color before:

Mossy green is ok, but I really needed something that brightened up the place. New color:
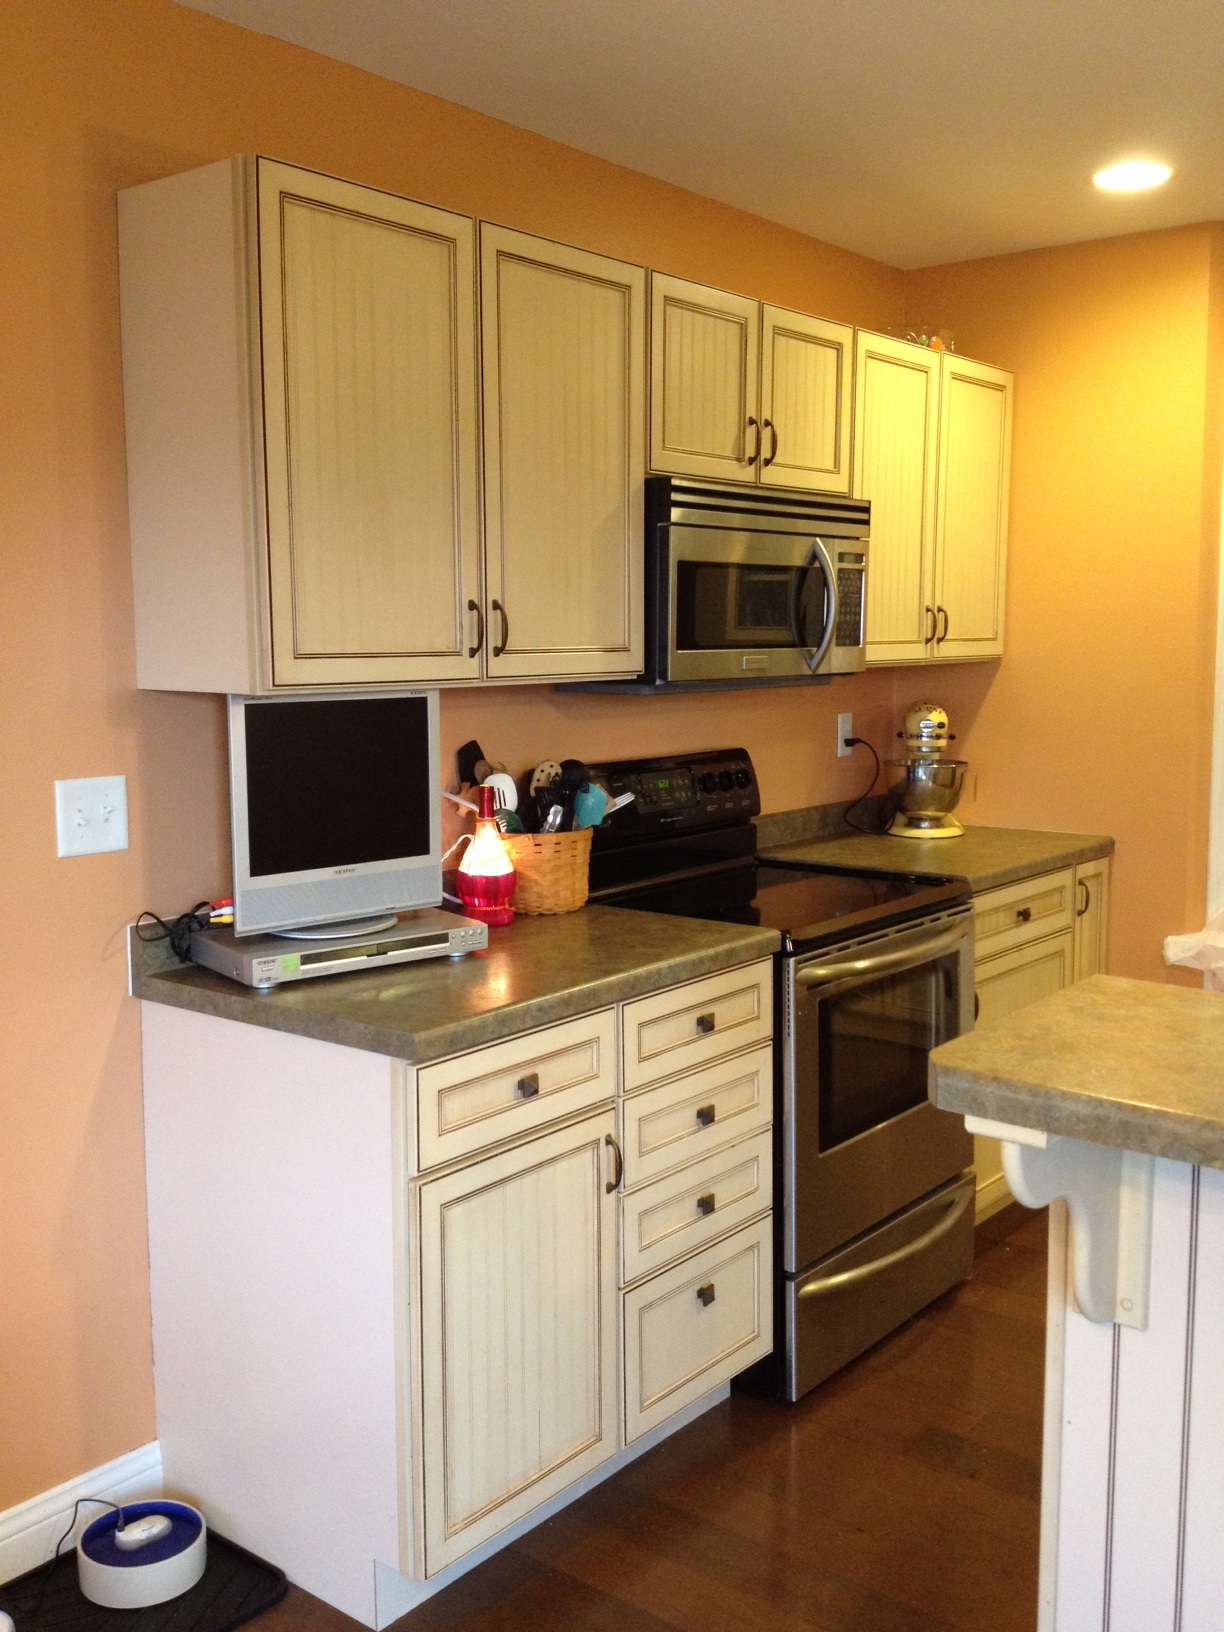
It reminds me of sunsets in our favorite place on Earth: Anguilla. (tiny island in the Caribbean. More on that another day. Do a Google Image search if the suspense is killing you!) Every morning and evening when I walk into the kitchen, I sigh. Sigh… anyway, onward!
I measured the places where we would need the backsplash, and cut the wallpaper to size. In addition to this long length, I needed two more lengths for other places in the kitchen.
I picked up these pots of Martha Stewart Metallic Glaze at Home Depot. These are AWESOME paints, and worked so well for this project. I just used a cheap foam brush and put on the copper color first as a base color. The foam brush let me squish in the paint into the little nooks and crannies.

The above photo makes the “black coffee” one look lighter, but the light must have caught the metallic-ness of the sticker on the lid. It’s really dark. The “cast bronze” color was my base, and I put “black coffee” on sparingly, to add detail.

Doesn’t it look cool already? 🙂 Then I put the darker color on with a dry brush, not covering the copper, but just using it to create some dimension and shadow… almost like it’s starting to patina or age.

The thing I recommend the most for this project is to have a fifteen year-old who “owes” you one, so you can ask him to paint on the base color (which is easy, but tedious!).

Here’s what it looks like close-up, after the black is on. It’s hard to tell that it’s there… but that’s kind of the point. I didn’t want the black to completely cover up the copper, but just to darken it a little in random spots. Really, as long as there isn’t too much paint on the brush (you can only have a little bit on at a time), you can’t mess this part up.


I’m just loving how this looks. Still 🙂 So, I’m almost ready to put up this wallpaper, but I thought I should put a layer of varnish on, just so it’s a little more wipeable when the inevitable food splash happens. It IS a kitchen, after all. Here’s what I used, got it at Michael’s:

I don’t know what drew me to that particular kind, but hey, whatever. I’m sure any type of clear-coat would work just fine.
Once all the varnish dried, (again— having the teenager helped with the application! Ha!) It was time to put the wallpaper up. I’d never done this before… but this wallpaper didn’t need to line up with anything (other than the bottoms of the cabinets and the top of the counter), so I just put some wallpaper paste (premixed kind) on the back of the paper, and some on the wall, and slapped it up there. I used the side of my hand to push out air bubbles… using something like the edge of a credit card would have been damaging to the wallpaper and its raised bits. Plus with the pattern, it’s very forgiving! I am sure there are smallish air bubbles still there, you just can’t see them!! I just went slowly and when I put the LONG piece up, I asked my go-to guy for help (Delton… he paints, he puts up wallpaper, he plays a mean guitar…).
I couldn’t even wait to put the under-cabinet lighting back up before I took pics. I mean, I’m SERIOUSLY in love with how it turned out.


The final thing I needed to do was to put an edging around the parts that didn’t meet up with the underside of the cabinets or the countertop. We found a piece of finish trim at Menard’s, which I just painted the copper color. I suppose I could have “aged” that with the black coffee glaze, but I simply wanted to be done! 🙂

Sorry about the poor quality of that particular pic. I should also mention that I used Andy’s chop saw to cut these pieces to size— and I successfully mitered corners, too! Yay! Yep, I did this!!! 😀


The one thing I’m not thrilled with is how the caulk went on… I’ll admit: I SUCK at applying caulk. No, really. I wish I could do it, maybe one day someone can show me the proper way, but I just fail miserably. We wanted to have a thin line of caulk between the very edge of the counter and the wallpaper. Andy ended up doing that for me, and I think in hindsight I’d have rather done clear caulk, but the stuff the builder used was white so we wanted it to be consistent. It’s a tiny detail, probably one only I am noticing, so oh well.
I recently had friends over that were on a mission trip to Kenya that I went on last month. One lovely friend in particular couldn’t BELIEVE that it was wallpaper, and gushed like a good friend should 😉 I think this project was the one that made my sweet friend Natalie first tell me I should start this blog. I had started the project last summer, and needed to finish that LONG piece behind the oven… it took a while for my motivation to catch up, I guess!
Oh, and the final cost for this entire project? For the wallpaper, the two pots of glaze and the varnish, the foam brushes, the wallpaper paste, and the trim pieces? Drum roll, please: $30. Honest. Now THAT is a good deal!
Thanks for checking out my cheap kitchen backsplash. Let me know what you think!
~Kristin


Wow that totally transforms the kitchen!
I think that is awesome!! I am in need of a cheapo backsplash so I’m going to try this out!